You can import generic pension files (PAPDIS v1.0 or v1.1) using the Husky upload wizard.
This way, the system will automatically identify any workforce changes and import your payroll information.
How to obtain your PAPDIS file
- If you are using Moneysoft as your payroll system
- If you are using Quickbooks Desktop as your payroll system
- If you are using Star Payroll as your payroll system
- If you are using Sage 50 Cloud as your payroll system
How to upload your PAPDIS file
You need to ensure that your PAPDIS file includes ALL workers (even if they have not joined or opted in). Once you have exported the correct PAPDIS file, you can upload it into Husky by following these steps:
- Log into Husky and click on the "Upload Payroll file" on the blue banner. Take into account that one file is required per pay frequency.

- On the Upload wizard, drag and drop the exported PAPDIS file or click on "Choose File".
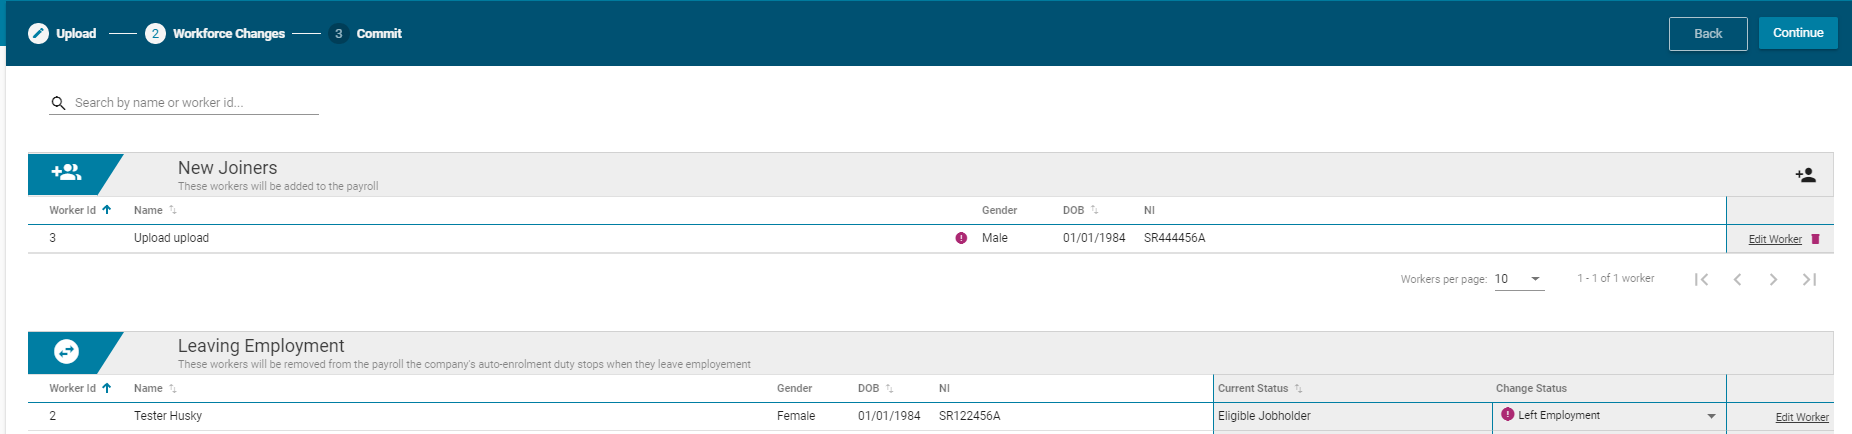
- If there are no issues with the file, you will be redirected to the second step of the wizard: the workforce changes page. This page will display any workforce changes identified for the current payroll.
- Make sure to double-check that the identified changes are correct. If there is any data missing, a validation icon will be displayed and you will need to complete the missing data before being able to continue (e.g. new joiner start date or left employment date).
- Click "Continue" and you will be redirected to the Payroll screen. Please make sure that you review the data imported (mainly the gross pay) before committing your Payroll. Remember that some PAPDIS files do not include the "Gross Pay", so this field could be set incorrectly in Husky.

